How to Build a Designer-to-Printer Marketplace Like Teespring with Printcart
Launch your own print-on-demand marketplace where designers upload and sell custom products—while you automate printing and fulfillment using Printcart. Learn the full setup, business model, and UX strategies behind Teespring-style success.
- By Netbase
- 5 views
- 0 reply

Netbase
This quote has stayed with me throughout my journey—especially as I built Printcart from the ground up "What doesn’t kill you makes you stronger."
This quote has stayed with me throughout my journey—especially as I built Printcart from the ground up.
I'm David, CEO of Printcart, a division of Netbase JSC, and I’ve dedicated the past 15 years to transforming the Web-to-Print and Print-on-Demand (POD) industry. My goal from the beginning has been clear: to help printing businesses around the world scale through automation, personalization, and smart technology.
Before Printcart, I spent years consulting and launching web-to-print platforms for printers of all sizes—from local shops to global enterprises. That experience taught me to ask the right questions:
How can we reduce manual steps for printers and let them focus on growth?
What tools do customers need to personalize and place their orders effortlessly?
How can we make the Web2Print journey smoother, faster, and more profitable?
At Printcart, we combine AI, cloud-based automation, and a plug-and-play customization engine to bring that vision to life. But more than features, we care about outcomes—helping our clients deliver better user experiences, close more deals, and scale sustainably.
I’m always open to new ideas and feedback from the community. If you’re exploring how to evolve your print business or launch a new eCommerce venture with Web2Print capabilities, feel free to connect directly.
Let’s talk growth.
? Email: project@printcart.com
? Website: https://printcart.com ...
Related Post
Introduction to Online Designer UX for Print Stores What is an online product designer in Web2Print? An online product designer is a web-based customization interface that allows customers to personalize print...
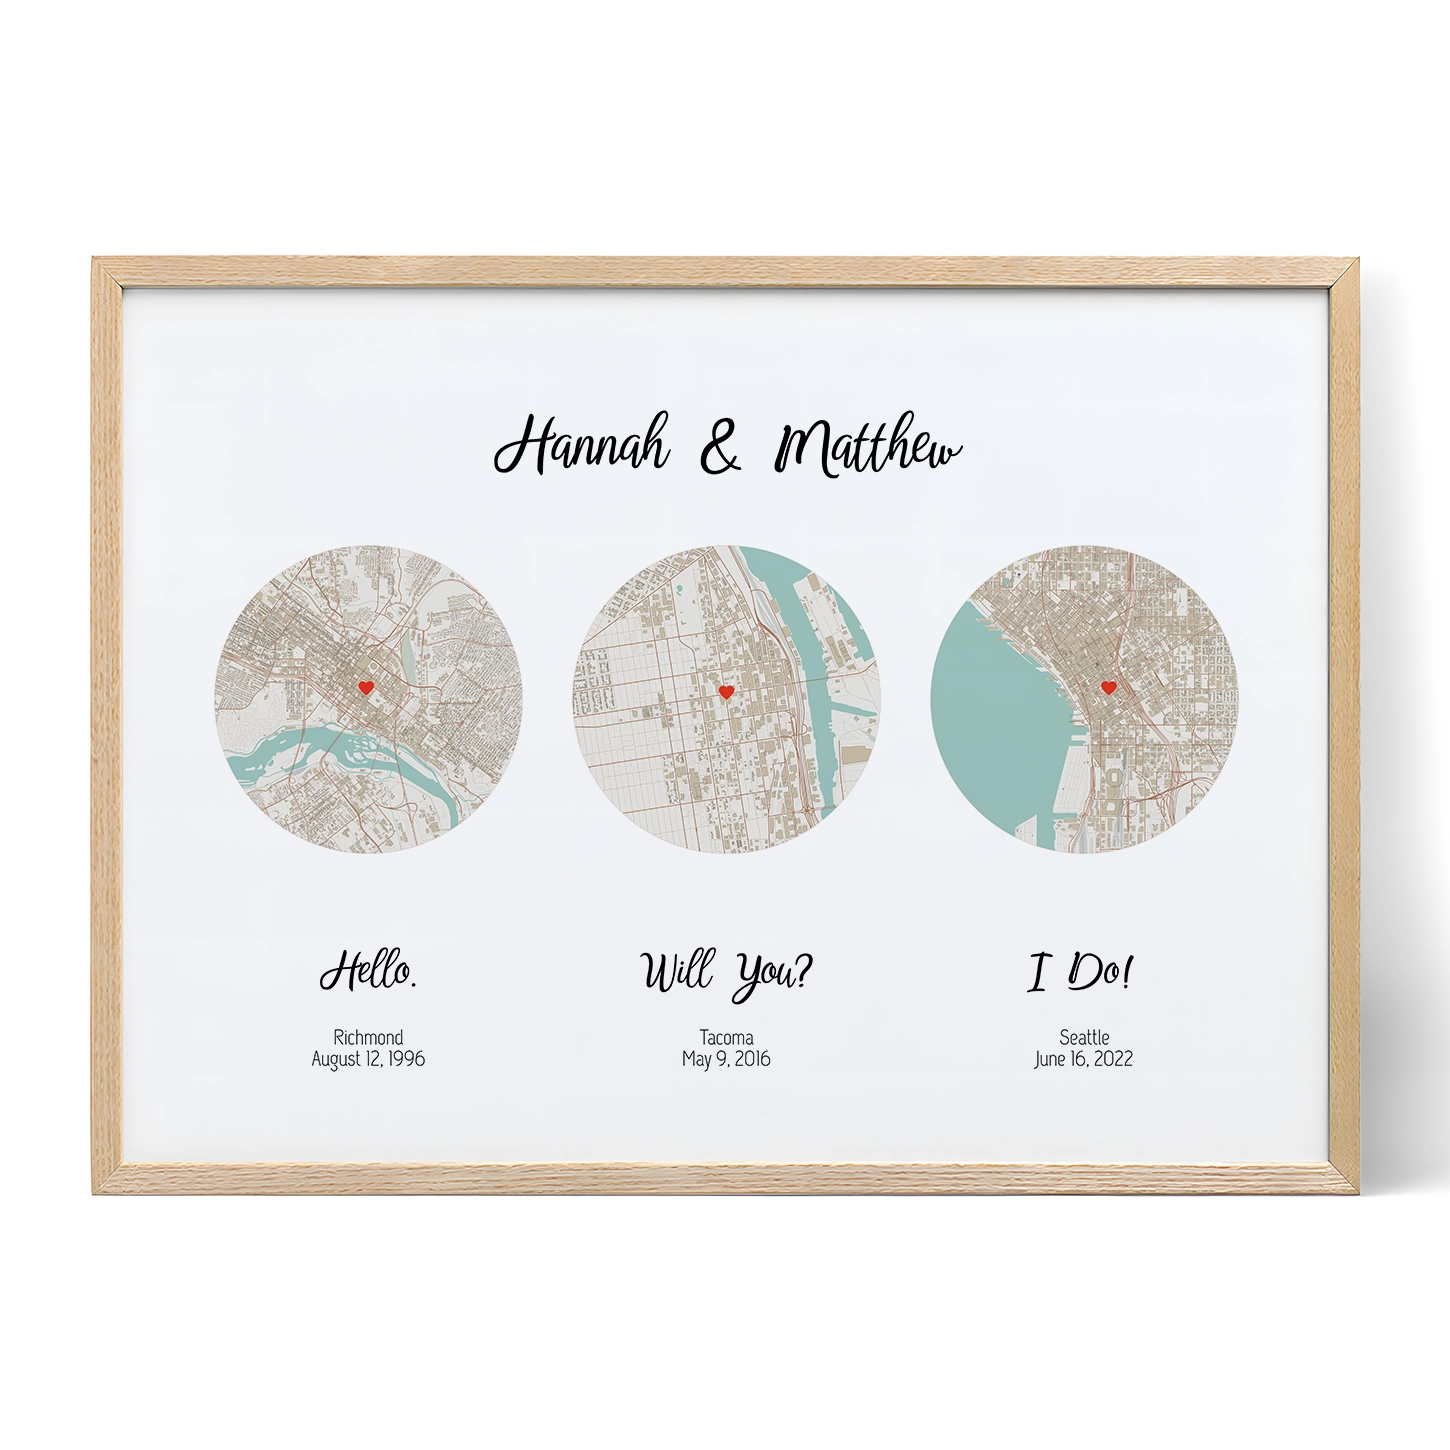
The Art of Personalization Capturing the Essence of Your Love Story: A Personalized Journey Finding unique and meaningful gifts can be challenging, especially when trying to capture personal love stories...
Why Design Templates Matter in Web2Print Workflow For print shop owners scaling product catalogs across packaging, signage, apparel, and business stationery—design templates are a game-changer. Instead of recreating print zones from...
Other Usefull Contents
You can see many success stories from our customers, and you may be one of them in the future


Introduction: What Is a Designer-to-Printer Marketplace?
Why the Teespring Business Model Works
A designer-to-printer marketplace is a platform where creatives can upload artwork and sell it on print products (like t-shirts, mugs, or posters), while the platform handles production, payment, and order fulfillment. This is the model popularized by Teespring, Redbubble, and Spreadshirt—and now you can replicate it using Printcart + WooCommerce.
The core advantage of this model lies in how it separates the responsibilities:
Designers create and upload graphics
Customers choose, personalize, and place orders
Platform owners route designs to printers and handle delivery
This structure enables zero inventory, scalable growth, and a recurring income stream for both the platform and the artists involved.
Who Benefits from This Platform Type?
A designer-to-printer marketplace isn’t just for launching t-shirt brands. It can serve multiple verticals:
? Independent artists and illustrators looking to monetize their work without managing fulfillment
?️ Print shops and dropship providers that want to onboard creative sellers and grow product variety
?️ Entrepreneurs and brand builders looking to test new ideas without risk or inventory
?? Schools, franchises, or event organizers needing user-submitted designs on demand
If your business wants to let others design products on your platform and earn commission or royalties, this model is ideal.
In the next section, we’ll explore the different marketplace models—from royalty-based to campaign-driven—and how each works with Printcart.
Business Model Options for Web2Print Marketplaces
Campaign-Based vs Product-Based vs Royalty-Based Models
When launching a designer-to-printer platform, choosing your business model impacts everything from payout workflows to marketing strategy. Let’s look at three proven models:
1. Campaign-Based Model (Like Teespring or Bonfire)
Designers launch time-limited campaigns (e.g., 7 days)
Products only go into production after a sales goal is reached
Creates urgency, supports fundraising, great for viral reach
Ideal for: Creators with an audience, nonprofits, social sellers
2. Product-Based Marketplace (Like Redbubble or Zazzle)
Designers publish editable templates linked to specific products
Customers browse, personalize, and order instantly
No minimums or deadlines
Ideal for: Print shops, on-demand storefronts, evergreen catalogs
3. Royalty-Based Licensing Platform
Artists license designs to vendors for a royalty per unit sold
No control over final product; designers focus only on assets
Common in publishing, merch licensing, and multi-store distribution
Ideal for: Scalable design resellers, packaging/branding agencies
Printcart supports product-based and royalty-based models natively, with potential for campaign add-ons via plugins or custom flows.
Monetization: Markup, Commission, or Subscription
To generate revenue, you can apply one or more pricing strategies:
Fixed markup on base printing cost (e.g., $10 base cost + $5 designer profit)
Revenue sharing with % split between platform and designer
Listing fees or upsells for featured placement, bulk upload, or template analytics
Paid subscription tiers for designers (Pro tools, higher limits, analytics)
Example monetization structure:
Base cost (printer): $9.00
Designer profit: $6.00
Platform commission: $3.00
Customer pays: $18.00
Printcart allows custom pricing logic per product, making it easy to support flexible markups and payouts.
In the next section, we’ll break down the technical and operational features you need to build a functional, scalable Web2Print platform.
Required Features for a Print-on-Demand Platform
Multi-Designer Submission and Approval System
To run a scalable Web2Print marketplace, you need a system that enables multiple designers to:
Register accounts and submit designs
Be approved or moderated by admins
Upload artwork and templates directly tied to product SKUs
Printcart’s Design Launcher includes:
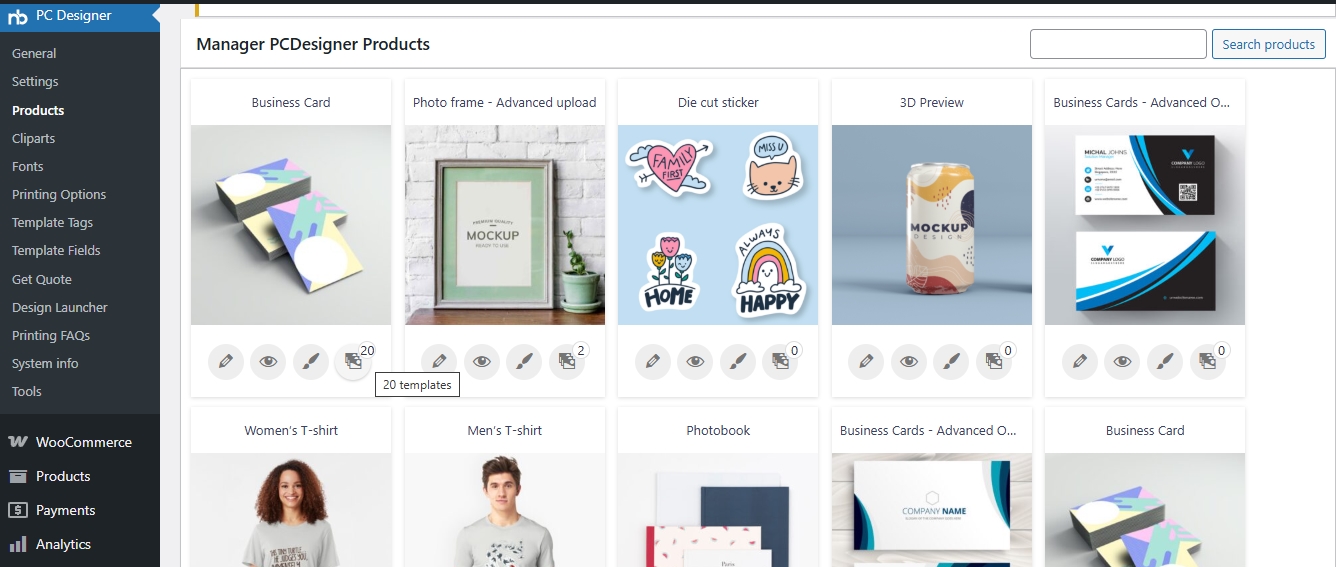
Designer dashboard with registration and approval workflows
Admin control over design status (pending, published, rejected)
Filtering by product type or designer name
This ensures that your catalog remains high-quality and consistent with your brand.
Editable Template and Design Management
Each product must be linked to an editable design file or template:
Designers can use Printcart’s Online Designer Tool to upload templates
Admins can tag templates by product (e.g. t-shirt, business card, sticker)
Customers can edit fields such as name, text, or image before ordering
Features include:
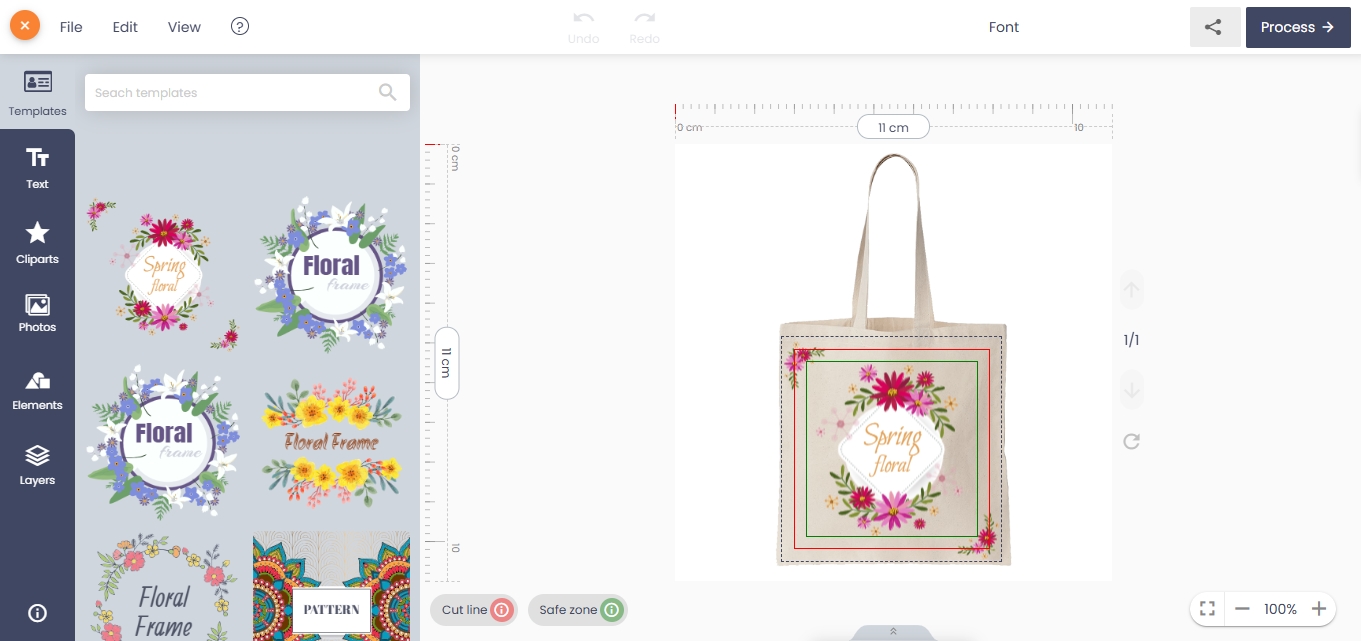
Safe zones, bleed lines, and DPI checks
Grouping elements into locked or editable fields
Template previews inside the product page and gallery view
Withdrawal, Royalty, and Payout Tracking
A core requirement is to track earnings for each designer and allow transparent withdrawals:
Printcart includes a withdrawal tab where admins can approve payouts
Sales attribution is tracked per template/designer
Manual or automated payout methods (e.g., PayPal, bank transfer)
Roadmap suggestion: Offer a designer earnings dashboard with real-time stats.
These foundational features enable a seamless experience for both your contributors and your fulfillment workflow.
Next, we’ll walk through how to configure these systems using Printcart + WooCommerce, including vendor roles, email notifications, and approval logic.
Setting Up the Platform with Printcart + WooCommerce
Install Printcart and Configure Vendor Roles
To launch your designer-to-printer marketplace, start by installing the Printcart plugin on a WooCommerce-enabled WordPress site. Once activated, configure the platform to distinguish between designers, admins, and customers.
Recommended user roles:
Designer: Can upload templates, view sales data, and request payouts
Admin: Can moderate designs, manage payout approvals, and control visibility
Customer: Can browse, customize, and purchase print products
Use a role editor plugin like User Role Editor or Members to fine-tune permissions.
Enable Design Launcher and Designer Dashboards
Printcart’s Design Launcher is the interface where designers submit their work. You can embed this page or link it from a "Sell Your Designs" menu tab.
Steps:
Enable Design Launcher Page in Printcart settings
Add tabs: "My Designs", "Upload New", "Withdraw", "Earnings"
Set default status: "Pending Approval" for new uploads
Customize the submission form to match your product taxonomy (e.g., t-shirt, hoodie, sticker).
Customize Approval Flow, Status Labels, and Email Triggers
To moderate the platform and keep your design catalog high quality:
Enable status filters: Pending, Approved, Rejected
Create email triggers: Notify designer when a design is published or denied
Add admin notes and rejection reasons
Helpful tools:
Use WP Mail SMTP to ensure email deliverability
Add status-based visibility (only "Approved" products show to customers)
Next, we’ll walk through what the designer experience looks like—from uploading editable templates to previewing and publishing them in the live store.
Designer UX: Upload, Edit, and Publish
How Designers Submit Editable Products
Once a designer is approved, they gain access to their personalized Design Launcher dashboard, where they can submit print-ready or editable design templates for specific products.
The submission process includes:
Selecting a product type (e.g., t-shirt, canvas, business card)
Uploading a design or creating one using the Printcart Online Designer
Tagging and categorizing the design for search and filtering
Assigning metadata: title, description, mockup image, and keywords
Designers can submit either:
Static designs (ready-to-print graphics)
Editable templates (with mapped text/image fields for customer personalization)
Admins can configure allowed file types (SVG, PNG, PSD) and enable live preview features.
Preview, Safe Zones, and Approval Status Visibility
Printcart allows real-time design previews so that designers know exactly how their work will appear on the live store. Key UX features include:
Safe zones and bleed guides: Highlighted during upload or creation
Live 2D preview of the final product and variant thumbnails
Approval status display: Designers see if their submission is pending, approved, or rejected—plus rejection notes
Visibility settings: Designers can draft, publish, or hide designs
UX Enhancements:
Allow designers to reorder or duplicate previous templates
Auto-generate mockups using Printcart’s image generator or 3D viewer
Once approved, the design becomes a live customizable product for customers.
Next, we’ll explore the customer-side UX—browsing designer products, customizing them, and completing checkout.
Customer UX: Browse, Customize, and Order
Product Gallery and Template Filtering
For customers, the journey starts with a visually engaging, searchable catalog of available designs. Printcart enables a template-driven storefront that includes:
Grid or masonry layout of designer-submitted products
Category filters (e.g., T-shirts, Stickers, Mugs)
Tag- or keyword-based search (e.g., "birthday", "retro", "funny")
Designer filters or profile-based browsing
You can optionally include badges like "Trending", "Editor’s Pick", or "New" to increase click-through rates.
Customer Journey from Design to Checkout
Once a customer selects a design, they are guided through a streamlined customization and ordering flow:
Preview the template (2D or 3D view)
Personalize fields like name, photo, or logo (editable fields only)
Add to cart or proceed with bulk order settings (if enabled)
Checkout using WooCommerce-native flow (integrated with your payment gateways)
Best practices for UX:
Show editable zones clearly with tooltips or outlines
Enable real-time updates as users type
Show mockup preview on the cart/checkout page
Include reorder or "Save as Draft" options for return customers
You can combine this flow with Printcart's Request a Quote feature if you serve B2B clients or custom sizes.
Next, we’ll explore print fulfillment and file routing workflows, including exporting production files and sending them to your print partner or dropship system.
Print Fulfillment and Automation
Exporting Print Files with Cut Marks, Bleed, and Resolution Check
After a customer places an order, your platform needs to generate print-ready output for your production team or fulfillment partner. Printcart automates this by exporting files that meet professional printing standards.
Export options include:
PDF, PNG, or SVG formats
Embedded bleed areas, cut lines, and safe zones
DPI checks to ensure all uploaded assets meet minimum resolution
Layer-flattened or separated outputs (e.g., front/back artwork)
Admins can choose default export specs per product type (e.g., CMYK for packaging, RGB for posters).
Order Routing to Printer or Dropshipper
Once a file is generated, it needs to reach the print facility. There are two main workflows:
Manual Routing
Admins receive print files and manually upload/send to print partner
Ideal for small teams or when using offline production
Automated Routing
Use tools like Zapier, n8n, or custom APIs to send order data and files to:
In-house printer software
Dropshipping partner (e.g., Printful, Gelato)
ERP/fulfillment system
Printcart integrates with Webhooks and supports export folder management (e.g., Dropbox, FTP).
Optional: QR Tracking, Print Tickets, and Custom Notes
Add QR codes on packing slips to link back to digital proofs
Attach customer comments or order metadata to files
Generate production tickets with size, quantity, SKU, and designer attribution
With fulfillment covered, you’re now ready to scale your marketplace by building out your creator community and monetization features.
Scaling the Marketplace and Creator Ecosystem
Featured Designers, Social Profiles, and Galleries
To retain creative talent and attract more buyers, your platform should highlight its best designers and let customers connect with them. Printcart supports:
Designer profile pages with bios, social links, and portfolios
Follower count or badges (e.g., Top Seller, New Talent)
Public galleries to showcase all published designs
Designer URLs (e.g., yourstore.com/designer/jordan)
Use homepage sliders or carousels to spotlight featured designers, trending products, or top-rated submissions.
Marketing Tools: Coupons, Launch Campaigns, and Bundles
To increase average order value and retention, provide creators with built-in marketing tools:
Custom discount codes: Linked to a specific designer or product
Launch kits: Auto-generate product mockups and sharing links for social promotion
Design bundles: Group multiple designs or SKUs into one product (e.g., sticker packs)
Email marketing: Notify followers of new drops or campaign launches
If you're using WooCommerce, plugins like Smart Coupons, AutomateWoo, or MailPoet integrate smoothly.
Community and Collaboration Features
As your designer ecosystem grows, community tools keep engagement high:
Comment sections or feedback on designs
Collaboration tools (e.g., designer + copywriter teams)
Design challenges or contests to encourage uploads
Add a blog or content hub to share creator stories, how-to tutorials, and case studies.
Next, we’ll close with a Go-To-Market checklist and recap the critical steps to building a designer-to-printer marketplace.
Conclusion + Go-To-Market Checklist
Final Thoughts: Why Now Is the Time to Launch a Designer-to-Printer Platform
The print-on-demand market is booming, and creators are actively looking for platforms that let them monetize their work without managing inventory. With tools like Printcart and WooCommerce, it's now possible to launch your own Teespring-style marketplace without writing a line of code.
By enabling designers to submit, sell, and earn through your storefront—and connecting them directly to print fulfillment—you’re creating a scalable, win-win business model.
Go-To-Market Checklist
Use this checklist to ensure you're ready for launch:
✅ Install Printcart + WooCommerce and configure roles
✅ Enable Design Launcher and submission moderation
✅ Set up payout workflows and royalty tracking
✅ Create initial product templates and designer onboarding guide
✅ Activate customer-facing gallery and filters
✅ Build homepage sections for featured designs and creators
✅ Test the end-to-end flow: designer upload → customer order → file export → fulfillment
✅ Prepare launch campaigns, affiliate offers, and designer invites
✅ Monitor UX and performance with analytics (e.g., Hotjar, GA4)
What’s Next: Growing and Innovating
Once you’re live, focus on scaling:
Run seasonal campaigns and niche product challenges
Onboard influencers or micro-creators with loyal audiences
Introduce affiliate or ambassador programs
Offer subscriptions or value-added bundles
Need help optimizing your Printcart UX flow or onboarding strategy? Visit the Printcart community tutorials or contact the team for hands-on support.
Ready to launch? Your creator-powered Web2Print platform awaits.
Frequently Asked Questions (FAQ)
1. Do I need to be a designer or printer to launch a marketplace like Teespring?
No. As the platform owner, you facilitate the connection between designers and printers. Printcart provides the tools to handle submissions, payments, and order fulfillment—even if you don't design or print yourself.
2. Can I control which designs appear on the storefront?
Yes. Printcart includes design approval workflows that let you review, approve, reject, or edit designer submissions before publishing them.
3. How do payouts work for designers?
Designers can request withdrawals through their dashboard. You (the admin) approve and process payouts manually or integrate with payment systems like PayPal or bank transfer plugins.
4. What types of products can I sell through this platform?
You can offer any printable product—t-shirts, mugs, phone cases, stickers, packaging, photobooks, and more. Printcart supports custom templates and mockups for all types.
5. Is it possible to integrate with third-party print providers like Printful or Gelato?
Yes. You can route orders using Zapier, n8n, or custom API integrations. This makes it easy to fulfill orders automatically without holding inventory.
6. Can designers have their own profile pages?
Absolutely. Each designer can have a profile with bio, social links, and a showcase of their live products. This supports a community-driven and portfolio-based approach.
7. What if a customer uploads low-resolution artwork?
Printcart includes DPI checks and resolution warnings during upload. You can set minimum requirements to ensure print quality and reduce failed orders.
Netbase
This quote has stayed with me throughout my journey—especially as I built Printcart from the ground up.
I'm David, CEO of Printcart, a division of Netbase JSC, and I’ve dedicated the past 15 years to transforming the Web-to-Print and Print-on-Demand (POD) industry. My goal from the beginning has been clear: to help printing businesses around the world scale through automation, personalization, and smart technology.
Before Printcart, I spent years consulting and launching web-to-print platforms for printers of all sizes—from local shops to global enterprises. That experience taught me to ask the right questions:
How can we reduce manual steps for printers and let them focus on growth?
What tools do customers need to personalize and place their orders effortlessly?
How can we make the Web2Print journey smoother, faster, and more profitable?
At Printcart, we combine AI, cloud-based automation, and a plug-and-play customization engine to bring that vision to life. But more than features, we care about outcomes—helping our clients deliver better user experiences, close more deals, and scale sustainably.
I’m always open to new ideas and feedback from the community. If you’re exploring how to evolve your print business or launch a new eCommerce venture with Web2Print capabilities, feel free to connect directly.
Let’s talk growth.
? Email: project@printcart.com
? Website: https://printcart.com